The Bathroom Reveal

Tuesday, May 13, 2014

(26 comments)
It's the bathroom reveal! The bathroom reveal you've been waiting forever for! Okay maybe you haven't really been up all night wondering when I was going to finally show you my bathroom but I'm pretty damn excited. If you remember back to my first update HERE , we did a short term fix by painting the walls white and removing any vestiges of 'granny-chic' doilies and curtains. I'm not kidding, the bathroom had curtains-see the proof below.

Then we had an unplanned renovation after we found out the toilet was leaking and had rotted the floor all the way down to the sub-floor (you can read all about that HERE). While it's not the gut job I had originally envisioned I'm quite happy with how it turned out and I am actually kind of glad we kept the retro charm of the blue and black tiles. It's obviously not going to be a shocking before and after because honestly it looks at though the new floor and sink have always been there but sometimes that's a good thing.


Despite my mistake of not cleaning up the black grout as quickly and as thoroughly as I should have, I'm still in love with my new floor. My Mom visited on the weekend and pointed out that it's the same floor my Grandma had in the pink and black bathroom in her house. A bathroom I always loved. I'm also glad we decided to go with a black border tile around the perimeter of the floor to tie into the black wall border. While we lost some storage space with a pedestal sink (Chad still doesn't want to talk about the installation and the extra work he still has to do to reinforce it) we still have plenty of room to store things in both the mirrored cabinet and the 'hobbit hole' and it visually opens up such a small space. 


I'm also really happy to say that I think it's very hard to identify the tiles that we had to match and replace. Good thing we still have 80 left in case something else goes wrong.


I hope you enjoyed seeing what we hope is the last renovation for quite some time, at least until we can save up some more money to overhaul the basement. I'll have to show you some pictures just so you can appreciate the faux wood paneling, the outdoor carpet and the movable bar. I still have a few new reveals in store and Chad has some tech tips to share so stay tuned. I'm off to Chicago for the long weekend here in Canada but I will be sure to take lots of pictures and fill you in on the all the amazing architecture, food and shopping.


Bathroom Update

Sunday, May 11, 2014

(1 comments)
I know you've been dying to find out more about where we are with the bathroom. Do they have a working toilet? Do they still have an orange floor? Are they still forced to brush their teeth in the kitchen sink? Well the answer folks is a resounding NO! But you don't think I'm just going to show you the finished bathroom that easily, am I? I think I'll draw it out just so you can get a sense of how long it took to finish the f%$^$%^* bathroom. Perhaps it's because we're a little reno'd out but this job wasn't pretty and just to convey this I have a feeling there will be more bleeped swear words in this post than Chad's last Tech Tips. At one point during the installation of the floor, the wall tiles and the pedestal sink- Chad actually stopped, put his tools down, looked at me and said, "I will never do another renovation with you again." Of course I ignored this, 'cause the basement isn't going to renovate itself, is it? Here is where we left off: A stunning orange floor and some creative repairs to wall tile.


We ended up driving to Vermont to get the floor tile that I wanted (at a much cheaper price than I could find in Montreal) from Lowe's. On a side note, everyone is so damn friendly there we were told several bathroom renovation horror stories and given several reno tips before we even made it to the cash.

The next day, I covered the hallway in plastic to protect it from the spray of the tile saw. It looked a bit like a scene from Dexter.


Chad got to work laying the thinset and then placing and cutting the tiles. I can't offer you any tips since my job is normally handing sheets of tile and cutting rows of tile off the mesh backing if necessary with a utility knife. All while drinking a coffee and continually asking how it's going. You can see why I'm so helpful. Chad did mention that working with this smaller tile was much easier than laying large format tile (like in the kitchen and hallway) because you don't have to worry about each tile being level with the other. 


Chad worked a section at a time, laying the thinset, then using the notched side of the trowel to make those little lines (I think I better stop with all these technical terms) and then laying the tile in place. He would then wipe off any excess on top of the tile. 


Once the thinset dried overnight, we started grouting. While I love the look of black grout, it is absolutely the messiest thing ever. It's like spreading peanut butter all over your floor. 


When we grouted the subway tile in the kitchen light grey, I felt I got a little overzealous with grout cleaning and removed too much. I thought I would be more conservative this time, remove less and then go back after it had set a bit to clean it up. After reading Daniel's post on Manhattan Nest last week about using black grout in his laundry room I very loudly cursed and wished I had read his tips before starting. Let's all learn from his sage advice now:

The thing I’ve learned about using black grout is that you really need to put a little extra effort into making those grout lines nice and crisp. The hardest part of the whole grouting process is getting the hang of rubbing the excess grout out of each individual grout line enough that they look uniform and clean. I learned this time around that getting the final grout haze off with a microfiber cloth (instead of a sponge) is much, much easier. After everything is dry, I like to go over all the grout lines one last time with my finger covered in a microfiber cloth, rubbing each line back and forth a couple times to get the edges of the grout extra-crisp.

I obviously did not do that and therefore do not have extra-crisp, uniform and clean looking grout lines. Instead, I had to go back for days after using steel wool to sand off the excess. That was super fun-lesson learned. Anyway, just a warning if you're ever planning on using black grout. 

The next step was waiting for our 'almost perfect match' replacement tiles to come in. Waiting and waiting... It took a week longer than they said it would for the tiles to arrive- which meant another week without a sink since we didn't want to install the sink, only to have to take it out again in order to have access to the area. This did give us plenty of time to remove all the tiles that were damaged and had been fixed with combinations of wadded up toilet paper, wallpaper and paint. We did have a working toilet for this week, just in case you were wondering.


 It was a happy day when we finally picked up the tile. When we got them home we realized that they were a pretty darn close match both in colour and size but they had these four little tabs on each side that made them slightly too big. We used what I think is a dremel tool with a tile cutting attachment and sanded all four sides of EVERY tile we needed. Thankfully it was only about 25 tiles. For all my Northern friends, I seriously felt like a stone carver-same noise, same dust-except no polar bear carving at the end. 


Here was Chad before he gave up and made me sand every single tile to fit. You can see here, the new tile is a pretty close match to the existing tile. Once the tiles were sanded the only other issue was the fact that they stick out a little but from the wall due to the old glue that was impossible to remove without damaging the wall further. Chad used mastic to glue the new tile in and then the next day we grouted the area with an off-white grout so that it matched the older grout. 

For those of you with eagle eyes, you'll notice that we also have a new toilet. While the old toilet had only been leaking due to what Chad swears was "improper installation" I really felt safer having a brand new toilet-and my Mom agreed with me, gifting us this stunning Kohler toliet. Yes, I just called a toilet 'stunning'. You can see we're almost there. The only thing left to do was install the pedestal sink and that required several trips back and forth to the hardware store and lots of swearing. Again, I'll have to let Chad fill in some details because all I know was that there were toggle bolts involved and screws that now have to be anchored into the other side of the wall???? So stay tuned for....the BIG REVEAL and Chad explaining whatever he had to do to make it all work (obviously not as exciting).


Surprise Bathroom Renovation!

Thursday, April 17, 2014

(148 comments)
In my last update about the bathroom, I mentioned we were holding off doing any renovations until we had saved up enough money to possibly gut and re-do the whole thing. I also lamented the fact that the old peel-and-stick floor tiles were gross. A very sweet commenter suggested that I just cover those up with more peel-and-stick tiles in the interim. Maybe a fun black and white pattern? You'd think I'd have learned my lesson by now that nothing is ever that simple and straightforward. Here was the bathroom last Friday night:


You have to agree that those floor tiles are hideous. They were also peeling up and had a large gap in their placement which was driving me crazy. Before I go into what happened, I'll show you some of my initial bathroom inspirations. First off, my dream bathroom. This would happen if we gutted the entire bathroom and then expanded it, moving the far wall back a couple of feet into the 'hobbit hole'. To illustrate this I've taken some poor quality and embarrassingly messy photos of said 'cave'.


Spoiler alert- I think you now know what happened to my peel and stick tiles (hint- I didn't pick orange ones). Expanding this wall would allow us to create a space to have a freestanding tub under the sloped ceiling and then make a glass shower enclosure where the bathtub is now. I would also imagine this option to be incredibly expensive. Here were my inspiration photos while I was still dreaming:

Top Left 1, 2, 3, 4

Don't they all look amazing! Not to worry I also had a second set of renovation options, just in case adding the tub and shower wasn't in our budget. These inspiration images include refreshing the tile but keeping a similar layout.
Top Left 1, 2, 3, 4
Back to my Saturday morning project. I noticed that the toilet seemed to be leaking. It didn't seem to be leaking that much and since I had debated removing the toilet and sink to stick more tiles down, I thought we could investigate this issue at the same time. So naive...once we removed the toilet we found it had probably been leaking for a long time. 

* On a side note my Mom had an 'I told you so' moment as she had mentioned the toilet may have issues months before due to the constant slight stream of water running down the side of the bowl. She said " this may be an indication of a bigger problem". Bottom line, she was right. If you have a toilet that is doing something like this, as my Mom said, go check it out now. 

The area around the toilet was completed rotted and we had to remove the entire bathroom floor. This turned out to be somewhat of an archaeological dig. After removing the peel-and-stick tile and a layer of rotten plywood, we found this:


Hello old linoleum! You can see the amount of damage around where the toilet was. I also loved seeing that the original bathroom floor matched the old kitchen floor. Too bad it didn't match the bathroom tile at all. We had to remove the floor all the way down to the sub-floor. Please also note our toilet in the bathtub-that was fun.


Luckily, the sub-floor and floor joists were not rotted. They were slightly wet and slightly moldy but only on the surface. We bleached the area and left the fan on overnight. Again, that is the only toilet in our entire house still in the bathtub. The next morning, Chad was super excited to get back to work on my small, quick update.


Here he is laying the new plywood floor and cursing me under his breath. Did I mention that he was scheduled to leave on a business trip that night and wasn't sure if he could re-install the toilet? I was very scared I would be toilet-less for an entire week. After the plywood, he cemented down the 'uncoupling and waterproofing underlayment' ( I don't think that's a word either but that's what Home Depot is telling me this Ditra product is). 


Then Chad thankfully re-installed the toilet (properly this time) and left me with this beautiful bathroom. I think we can call it a day with this one. I mean orange and blue are complimentary colors.

I had always planned on replacing the sink and vanity with a pedestal sink as the room is way too small for such a large piece. I found a great deal on one while we were in Vermont a few months ago, so we already had it waiting in the basement. The old sink had covered some, but not all, of the tile damage. The previous owners had attempted to fix it with paint. I think they did an excellent job, don't you? I mean you can hardly tell what's painted and what's original. You can also see where I scratched some of it off in my earlier investigation of 'what the hell is this?' 

On one hand, this renovation was completely unplanned. On the other, this had been something I was debating since we moved in. The bathroom was the one room in the house that had vintage charm but was functional (unlike the unusable kitchen). Would I be destroying one of the last vestiges of the 1950s by removing the blue tile and replacing it with a boring, basic white tiled modern bathroom simply for resale value? It looks like at least for now, the decision has been made for me. The bathroom is staying blue! I found a few great examples of retro bathrooms to reconfirm my decision:

Top Left 1, 2, 3, 4, 5
Up next, the search for replacement vintage blue tile. Retro Renovation is a great resource and a fun browse if you love all things retro. Their guide to finding vintage tile was how I ended up finding a source right here in Montreal. It also lead me to what looks like my dream tile store in New York State- World of Tile


If only I hadn't found a tile that was almost an exact match through the Dal-Tile store in town, I could have convinced Chad to drive 6 hours to experience a place where vintage tile dreams most certainly come true. The only other thing left to do now is to purchase floor tile to complete my new vision.


I wanted something for the floor that would look like it had always been part of the bathroom. I will admit despite all the unplanned work, part of me is excited to finally be able to change the floor and not just slap down another layer of peel-and-stick. I had seen what I now know is called a 'mosaic pinwheel' pattern tile while we were at a big-box store in Vermont at a very reasonable price. Much like in the retro colorful bathroom inspiration picture, this type of tile was historically used in 1950s bathrooms. So now all that's left to do is go on a shopping trip and start tiling!


The Updated Bathroom

Sunday, March 30, 2014

(3 comments)
I can't exactly call this a big reveal or a big renovation because we haven't quite tackled it yet. The bathroom is in perfect working order-for the 1950's. Now, I love a good retro bathroom and really it isn't that bad but I know it could be so much better. Here is the photo from the real estate listing:


Firstly, it was very, very clean and well taken care of- so that won points with me. I love some of the retro details like the black border tile and the built in cup and toothbrush holder. Secondly, it has potential due to what I call the "hobbit-hole". There is a door just out of frame that opens into a huge storage area under the rafters. I'll do a whole post about what the possible renovation plans could be (one with a realistic budget and one with a dream budget-hello glass shower room and Turkish tile floor).

 I painted away the yellow right after I finished painting away the pink in the bedroom. It's amazing what a coat or two of white paint can do.


Other than painting, I removed the curtain inside the shower (obviously), added a simple black and white shower curtain and a few accessories. The crazy bird-hat lady photo is someone's old modeling portfolio shot that I found at the flea market and the vase, soap dispenser and shower curtain are all from Target. Chad also had to add in an outlet because there wasn't a single one in the bathroom.


The only thing I'm struggling to live with is the floor. We have to save up enough money and create another bathroom in the basement before we even start on this one. I had hoped there might be some cute black and white tile under the peel-and-stick tiles but sadly, there is only more linoleum. Even though we won't be tackling this reno in the near future, it hasn't stopped me from planning and 'pinning' away. Is your bathroom your dream bathroom and if not  how do you make the one you have work for right now?


Back from the Dead

Thursday, January 31, 2013

(1 comments)
Well hello there. I'm finally getting over a cold/flu and feeling like I'm a hundred and I have a post about my bathroom. These things are not related- I'm not that gross. Since I felt like I was dying, I didn't have time to take picture of the new apartment in the light of day. I did have time to take pictures of the bathroom before I came down with what felt like 'Spanish Flu' (I've obviously managed to watch every Season of Downton Abbey and don't know why I was so late to that party).

When we were touring the apartment the first time, the owners were very proud of their 'renovated' bathroom. I don't have any before pictures but I know when you see the 'after' you're going to be scratching your head asking 'Sarah, how can you call salvaging a beige toilet and sink and having a space pod 70s shower, renovating?' EXACTLY.... I had never seen a shower pod before. It's like a time machine. It has a light inside it! There is also a red heat lamp in the bathroom. If you turn off the other lights and get into the shower with it on you really do feel like you could time travel.


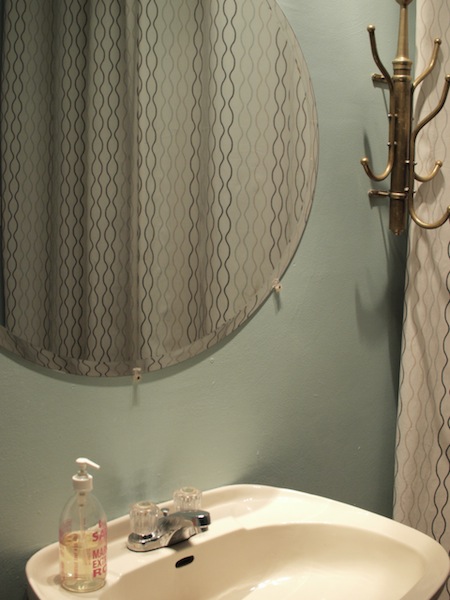
I thought I may be able to live with this but it only took a week or so to realize I could not look at that pod every day. I needed to cover it up. My plan involved hanging curtains in front of it like a giant shower curtain panel so I would never need to see it. I think it's worked out pretty well. The curtains are from Ikea


The only other thing that I did was paint. The bathroom was originally white and it only served to highlight the beige fixtures and how orange the floor tiles are. I picked a pale grey/blue and I think it really downplayed both elements. 


The only things I didn't really mind were the brass toilet paper roll holder and towel hanger. I just need to get some grey striped Turkish bath towels to hang there. I also used my Grandmother's gold artwork to tie into the brass. Although it's not the renovated bathroom of my dreams, I think it's a pretty good use of what we have and I can still pretend I'm in a space pod.


Brownie All rights reserved © Blog Milk Design - Powered by Blogger